Hive 安装部署
本次用的是伪集群模式,只用了一台hadoop101。公司电脑配置有点低,伤不起。
本次使用的hive版本1.2.1,下载地址:http://archive.apache.org/dist/hive/
安装及配置
上传并解压安装包
- 把 apache-hive-1.2.1-bin.tar.gz 上传到 linux 的/opt/software 目录下
解压 apache-hive-1.2.1-bin.tar.gz 到/opt/module/目录下面
[root@hadoop101 software]# tar -zxvf apache-hive-1.2.1-bin.tar.gz -C /opt/module/
配置
1 修改 apache-hive-1.2.1-bin.tar.gz 的名称为 hive-1.2.1
[root@hadoop101 module]# mv apache-hive-1.2.1-bin hive-1.2.1
2 修改/opt/module/hive/conf 目录下的 hive-env.sh.template 名称为 hive-env.sh
[root@hadoop101 hive-1.2.1]# cd conf/[root@hadoop101 conf]# ll总用量 188-rw-rw-r--. 1 root root 1139 4月 30 2015 beeline-log4j.properties.template-rw-rw-r--. 1 root root 168431 6月 19 2015 hive-default.xml.template-rw-rw-r--. 1 root root 2378 4月 30 2015 hive-env.sh.template-rw-rw-r--. 1 root root 2662 4月 30 2015 hive-exec-log4j.properties.template-rw-rw-r--. 1 root root 3050 4月 30 2015 hive-log4j.properties.template-rw-rw-r--. 1 root root 1593 4月 30 2015 ivysettings.xml[root@hadoop101 conf]# mv hive-env.sh.template hive-env.sh
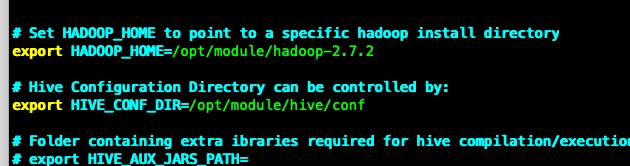
3 配置hive-env.sh
配置 HADOOP_HOME 路径
export HADOOP_HOME=/opt/module/hadoop-2.7.2
配置 HIVE_CONF_DIR 路径
export HIVE_CONF_DIR=/opt/module/hive/conf
4 配置 /etc/profile
##HIVE_HOMEexport HIVE_HOME=/opt/module/hive-1.2.1export PATH=$PATH:$HIVE_HOME/bin
Hadoop 集群配置
1 必须启动 hdfs 和 yarn
[root@hadoop101 hadoop-2.7.2]# sbin/start-dfs.sh[root@hadoop101 hadoop-2.7.2]# sbin/start-yarn.sh
2 在 HDFS 上创建/tmp 和/user/hive/warehouse 两个目录并修改他们的同组权限可写
[root@hadoop101 ~]# hdfs dfs -mkdir /tmp[root@hadoop101 ~]# hdfs dfs -mkdir -p /user/hive/warehouse[root@hadoop101 ~]# hdfs dfs -chmod 777 /tmp[root@hadoop101 ~]# hdfs dfs -chmod 777 /user/hive/warehouse
Hive 基本操作
[root@hadoop101 ~]# hive -hUnrecognized option: -husage: hive-d,--define <key=value> Variable subsitution to apply to hivecommands. e.g. -d A=B or --define A=B--database <databasename> Specify the database to use-e <quoted-query-string> SQL from command line-f <filename> SQL from files-H,--help Print help information--hiveconf <property=value> Use value for given property--hivevar <key=value> Variable subsitution to apply to hivecommands. e.g. --hivevar A=B-i <filename> Initialization SQL file-S,--silent Silent mode in interactive shell-v,--verbose Verbose mode (echo executed SQL to theconsole)
启动hive
[root@hadoop101 ~]# hiveLogging initialized using configuration in jar:file:/opt/module/hive-1.2.1/lib/hive-common-1.2.1.jar!/hive-log4j.propertieshive>
查看数据库
hive> show databases;OKdefaultTime taken: 0.932 seconds, Fetched: 1 row(s)
打开默认数据库
hive> use default;OKTime taken: 0.031 seconds
显示default中所有的表
hive> show tables;OKTime taken: 0.056 seconds
目前还没有表
创建一个表
hive> create table student(id int,name string);OKTime taken: 0.584 secondshive> show tables;OKstudentTime taken: 0.039 seconds, Fetched: 1 row(s)
查看表结构
hive> desc student;OKid intname stringTime taken: 0.137 seconds, Fetched: 2 row(s)
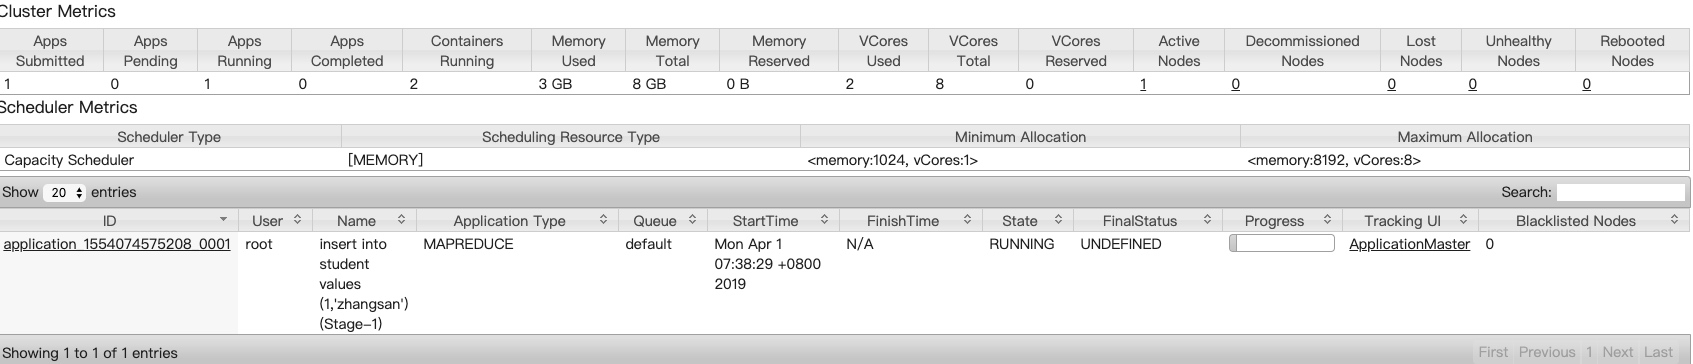
向表中插入数据
hive> insert into student values (1,'zhangsan');Query ID = root_20190401073825_9b6c4f84-e5ee-4a7d-9f63-03702a90c80fTotal jobs = 3Launching Job 1 out of 3Number of reduce tasks is set to 0 since there's no reduce operatorStarting Job = job_1554074575208_0001, Tracking URL = http://hadoop101:8088/proxy/application_1554074575208_0001/Kill Command = /opt/module/hadoop-2.7.2/bin/hadoop job -kill job_1554074575208_0001Hadoop job information for Stage-1: number of mappers: 1; number of reducers: 02019-04-01 07:38:44,534 Stage-1 map = 0%, reduce = 0%2019-04-01 07:38:56,752 Stage-1 map = 100%, reduce = 0%, Cumulative CPU 2.09 secMapReduce Total cumulative CPU time: 2 seconds 90 msecEnded Job = job_1554074575208_0001Stage-4 is selected by condition resolver.Stage-3 is filtered out by condition resolver.Stage-5 is filtered out by condition resolver.Moving data to: hdfs://hadoop101:9000/user/hive/warehouse/student/.hive-staging_hive_2019-04-01_07-38-25_714_6570492894469965354-1/-ext-10000Loading data to table default.studentTable default.student stats: [numFiles=1, numRows=1, totalSize=11, rawDataSize=10]MapReduce Jobs Launched:Stage-Stage-1: Map: 1 Cumulative CPU: 2.09 sec HDFS Read: 3560 HDFS Write: 82 SUCCESSTotal MapReduce CPU Time Spent: 2 seconds 90 msecOKTime taken: 33.972 seconds
查询表中的数据
hive> select * from student;OK1 zhangsanTime taken: 0.316 seconds, Fetched: 1 row(s)
退出hive
hive> quit;[root@hadoop101 ~]#
注意事项
默认情况下,Hive中metastore(元数据存储)的三种方式:
- 内嵌Derby方式
- Local方式
- Remote方式
参考文章 【hive】——metastore的三种模式
Hive默认的启动模式是内嵌Derby方式,一般用于单元测试,这种存储方式有一个缺点:在同一时间只能有一个进程连接使用数据库。下一篇解决这个问题。


还没有评论,来说两句吧...