Netty组件详解
之前在做项目的时候使用到了Netty这个网络框架,对于Java中的IO模型有了进一步的了解,熟悉的NIO非阻塞的模式。而Netty就是对于Java NIO 的高级封装。这篇文章就是个人根据Netty4.1.6的源码,进行了总结。
Netty组件
NioEventLoop
对于Netty中的NioEventLoop这个组件来说,它就是类似于写的普通网络编程中的通过创建一个新的线程Thread来实现对于客户端的监听,这个监听如果放到主线程中会导致主线程阻塞,所以在实现的时候通过创建要给新线程的方式来实现。从这个角度上理解,这个NioEventLoop组件,主要做的两件事情,第一,就是建立客户端和服务器端段的连接,保证连接正常。第二,实现客户端和服务器端的数据的交互。
但是在使用Thread实现上面两个功能的时候要保证监听过程处于一个持续监听的状态,也就是说在其中要实现一个死循环。通过这个死循环来持续监听连接在Netty中也提供了这样的一个方法。那就是下面这个方法
@Overrideprotected void run() {//实现一个死循环不断去绑定对应的监听状态for (;;) {try {//根据不同的装响应实现不同的操作switch (selectStrategy.calculateStrategy(selectNowSupplier, hasTasks())) {case SelectStrategy.CONTINUE:continue;case SelectStrategy.SELECT:select(wakenUp.getAndSet(false));// 'wakenUp.compareAndSet(false, true)' is always evaluated// before calling 'selector.wakeup()' to reduce the wake-up// overhead. (Selector.wakeup() is an expensive operation.)//// However, there is a race condition in this approach.// The race condition is triggered when 'wakenUp' is set to// true too early.//// 'wakenUp' is set to true too early if:// 1) Selector is waken up between 'wakenUp.set(false)' and// 'selector.select(...)'. (BAD)// 2) Selector is waken up between 'selector.select(...)' and// 'if (wakenUp.get()) { ... }'. (OK)//// In the first case, 'wakenUp' is set to true and the// following 'selector.select(...)' will wake up immediately.// Until 'wakenUp' is set to false again in the next round,// 'wakenUp.compareAndSet(false, true)' will fail, and therefore// any attempt to wake up the Selector will fail, too, causing// the following 'selector.select(...)' call to block// unnecessarily.//// To fix this problem, we wake up the selector again if wakenUp// is true immediately after selector.select(...).// It is inefficient in that it wakes up the selector for both// the first case (BAD - wake-up required) and the second case// (OK - no wake-up required).if (wakenUp.get()) {selector.wakeup();}default:// fallthrough}cancelledKeys = 0;needsToSelectAgain = false;final int ioRatio = this.ioRatio;//开始处理每个链接if (ioRatio == 100) {try {processSelectedKeys();} finally {// Ensure we always run tasks.runAllTasks();}} else {final long ioStartTime = System.nanoTime();try {processSelectedKeys();} finally {// Ensure we always run tasks.final long ioTime = System.nanoTime() - ioStartTime;runAllTasks(ioTime * (100 - ioRatio) / ioRatio);}}} catch (Throwable t) {handleLoopException(t);}// Always handle shutdown even if the loop processing threw an exception.try {if (isShuttingDown()) {closeAll();if (confirmShutdown()) {return;}}} catch (Throwable t) {handleLoopException(t);}}}
从代码中可以看出来真正实现对于数据读写操作就是从processSelectedKeys()方法开始的,而这个方法processSelectedKeys()。主要的作用是什么呢?
//调用上面的处理方法private void processSelectedKeys() {//如果SelectionKey为空if (selectedKeys != null) {processSelectedKeysOptimized(selectedKeys.flip());} else {processSelectedKeysPlain(selector.selectedKeys());}}private void processSelectedKeysOptimized(SelectionKey[] selectedKeys) {for (int i = 0;; i ++) {final SelectionKey k = selectedKeys[i];if (k == null) {break;}// null out entry in the array to allow to have it GC'ed once the Channel close// See https://github.com/netty/netty/issues/2363selectedKeys[i] = null;final Object a = k.attachment();if (a instanceof AbstractNioChannel) {processSelectedKey(k, (AbstractNioChannel) a);} else {@SuppressWarnings("unchecked")NioTask<SelectableChannel> task = (NioTask<SelectableChannel>) a;processSelectedKey(k, task);}if (needsToSelectAgain) {// null out entries in the array to allow to have it GC'ed once the Channel close// See https://github.com/netty/netty/issues/2363for (;;) {i++;if (selectedKeys[i] == null) {break;}selectedKeys[i] = null;}selectAgain();// Need to flip the optimized selectedKeys to get the right reference to the array// and reset the index to -1 which will then set to 0 on the for loop// to start over again.//// See https://github.com/netty/netty/issues/1523selectedKeys = this.selectedKeys.flip();i = -1;}}}private void processSelectedKeysPlain(Set<SelectionKey> selectedKeys) {// check if the set is empty and if so just return to not create garbage by// creating a new Iterator every time even if there is nothing to process.// See https://github.com/netty/netty/issues/597if (selectedKeys.isEmpty()) {return;}Iterator<SelectionKey> i = selectedKeys.iterator();for (;;) {final SelectionKey k = i.next();final Object a = k.attachment();i.remove();if (a instanceof AbstractNioChannel) {processSelectedKey(k, (AbstractNioChannel) a);} else {@SuppressWarnings("unchecked")NioTask<SelectableChannel> task = (NioTask<SelectableChannel>) a;processSelectedKey(k, task);}if (!i.hasNext()) {break;}if (needsToSelectAgain) {selectAgain();selectedKeys = selector.selectedKeys();// Create the iterator again to avoid ConcurrentModificationExceptionif (selectedKeys.isEmpty()) {break;} else {i = selectedKeys.iterator();}}}}
可以看到上面的processSelectedKeys()方法通过对于SelectionKey的判断实现了两种不同的逻辑。但是这两个逻辑最为核心的操作就是AbstractNioChannel类的存在,可以继续跟进源码会发现这个类其实就是一个Channel,在Java NIO中我们知道一个Channel就类似于普通网络编程中的一个Socket。所以说这里的AbstractNioChannel是对于Channel在Netty NIO实现的基础上做了进一步的封装。
Channel
在上面提到的概念就是Channel可以理解为一个Socket那么既然是用来做客户端和服务器端的数据传递工作,首先需要搞清楚的是Channel是什么时候创建?第二点就是Channel底层实现也是通过Socket来实现的又对Socket做了哪些优化呢?
在NioEventLoop类中有如下的一个方法
private void processSelectedKey(SelectionKey k, AbstractNioChannel ch) {//获取到unsafefinal AbstractNioChannel.NioUnsafe unsafe = ch.unsafe();if (!k.isValid()) {final EventLoop eventLoop;try {eventLoop = ch.eventLoop();} catch (Throwable ignored) {// If the channel implementation throws an exception because there is no event loop, we ignore this// because we are only trying to determine if ch is registered to this event loop and thus has authority// to close ch.return;}// Only close ch if ch is still registerd to this EventLoop. ch could have deregistered from the event loop// and thus the SelectionKey could be cancelled as part of the deregistration process, but the channel is// still healthy and should not be closed.// See https://github.com/netty/netty/issues/5125if (eventLoop != this || eventLoop == null) {return;}// close the channel if the key is not valid anymoreunsafe.close(unsafe.voidPromise());return;}try {int readyOps = k.readyOps();// We first need to call finishConnect() before try to trigger a read(...) or write(...) as otherwise// the NIO JDK channel implementation may throw a NotYetConnectedException.if ((readyOps & SelectionKey.OP_CONNECT) != 0) {// remove OP_CONNECT as otherwise Selector.select(..) will always return without blocking// See https://github.com/netty/netty/issues/924int ops = k.interestOps();ops &= ~SelectionKey.OP_CONNECT;k.interestOps(ops);unsafe.finishConnect();}// Process OP_WRITE first as we may be able to write some queued buffers and so free memory.if ((readyOps & SelectionKey.OP_WRITE) != 0) {// Call forceFlush which will also take care of clear the OP_WRITE once there is nothing left to writech.unsafe().forceFlush();}// Also check for readOps of 0 to workaround possible JDK bug which may otherwise lead// to a spin loop//这里有一个对于OP_ACCEPT的判断。if ((readyOps & (SelectionKey.OP_READ | SelectionKey.OP_ACCEPT)) != 0 || readyOps == 0) {unsafe.read();if (!ch.isOpen()) {// Connection already closed - no need to handle write.return;}}} catch (CancelledKeyException ignored) {unsafe.close(unsafe.voidPromise());}}
在上面这个方法中有一块逻辑是指定注意的
if ((readyOps & (SelectionKey.OP_READ | SelectionKey.OP_ACCEPT)) != 0 || readyOps == 0) {unsafe.read();if (!ch.isOpen()) {// Connection already closed - no need to handle write.return;}}
在上面这段逻辑中,可以看到在SelectionKey判断的时候会有一个OP_ACCEPT事件,这里就会有一个unsafe.read的方法。可进入NioMessageUnsafe中查看read方法如下。而这个NioMessageUnsafe就是对于连接处理的一个类。
private final class NioMessageUnsafe extends AbstractNioUnsafe {private final List<Object> readBuf = new ArrayList<Object>();@Overridepublic void read() {assert eventLoop().inEventLoop();final ChannelConfig config = config();final ChannelPipeline pipeline = pipeline();final RecvByteBufAllocator.Handle allocHandle = unsafe().recvBufAllocHandle();allocHandle.reset(config);boolean closed = false;Throwable exception = null;try {try {do {int localRead = doReadMessages(readBuf);if (localRead == 0) {break;}if (localRead < 0) {closed = true;break;}allocHandle.incMessagesRead(localRead);} while (allocHandle.continueReading());} catch (Throwable t) {exception = t;}int size = readBuf.size();for (int i = 0; i < size; i ++) {readPending = false;pipeline.fireChannelRead(readBuf.get(i));}readBuf.clear();allocHandle.readComplete();pipeline.fireChannelReadComplete();if (exception != null) {closed = closeOnReadError(exception);pipeline.fireExceptionCaught(exception);}if (closed) {inputShutdown = true;if (isOpen()) {close(voidPromise());}}} finally {// Check if there is a readPending which was not processed yet.// This could be for two reasons:// * The user called Channel.read() or ChannelHandlerContext.read() in channelRead(...) method// * The user called Channel.read() or ChannelHandlerContext.read() in channelReadComplete(...) method//// See https://github.com/netty/netty/issues/2254if (!readPending && !config.isAutoRead()) {removeReadOp();}}}}
在上面逻辑中值得关注一个方法便是doReadMessages(readBuf)方法,查看这个方法的实现会发现,是由NioServerSocketChannel实现。到这里终于是接近Java NIO的底层了。
@Overrideprotected int doReadMessages(List<Object> buf) throws Exception {SocketChannel ch = javaChannel().accept();try {if (ch != null) {buf.add(new NioSocketChannel(this, ch));return 1;}} catch (Throwable t) {logger.warn("Failed to create a new channel from an accepted socket.", t);try {ch.close();} catch (Throwable t2) {logger.warn("Failed to close a socket.", t2);}}return 0;}
关于Java底层NIO的实现,而这里所对应的SocketChannel就是对应的NIO模型中的SocketChannel。通过获取到对应的ServerSocketChannel,进行的accept操作。在获取到对象之后将其添加到一个Object的列表中。而这个列表理解为获取到了一个Channel的列表。Netty直接把一个SocketChannel封装成了一个NioSocketChannel。然后通过一个List进行返回,最后只需要通过这个NioSocketChannel进行数据的读写操作就可以了。
@Overrideprotected ServerSocketChannel javaChannel() {return (ServerSocketChannel) super.javaChannel();}
ByteBuf
在Java实现的NIO编程中有一个ByteBuffer,这个ByteBuffer是对IO流的封装,在Netty中还有就是对于ByteBuffer的封装ByteBuf类,在这个类中定义了很多的read和write方法, 而这些方法就是对一普通IO中的输入输出流。如下图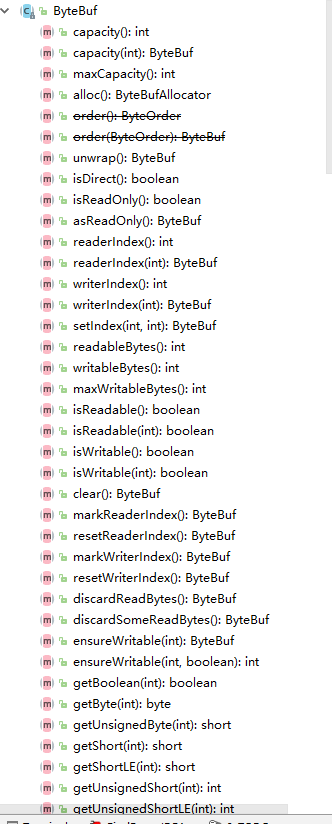
Pipline
Pipeline,对应的普通IO编程中的对于数据的处理操作。那么Netty是什么时候将Pipeline加入到对应的连接处理过程中的呢?深究一下会发现在AbstractChannel的构造方法中调用了newChannelPipeline方法。而这个方法创建了一个默认的ChannelPipeline。也就是说我们也可以自己实现这个Pipeline。
protected AbstractChannel(Channel parent) {this.parent = parent;id = newId();unsafe = newUnsafe();pipeline = newChannelPipeline();}protected DefaultChannelPipeline newChannelPipeline() {return new DefaultChannelPipeline(this);}
通过下面的操作,最终将逻辑处理操作加载到Channel中。
protected DefaultChannelPipeline(Channel channel) {this.channel = ObjectUtil.checkNotNull(channel, "channel");succeededFuture = new SucceededChannelFuture(channel, null);voidPromise = new VoidChannelPromise(channel, true);tail = new TailContext(this);head = new HeadContext(this);head.next = tail;tail.prev = head;}
ChannelHandler
对应业务逻辑处理块,在ChannelPipeline中有很多的add方法、remove方法其实这些方法就是实现了对于处理逻辑的动态的处理。这里使用的一个策略模式 使用者可以根据不同的处理逻辑实现不同的Handler,但是整个的处理逻辑是不变的就是实现对于数据的读写操作。这里看一个比较常用的方法addLast()。无论传入什么样的Handler都不会改变这个方法的实现逻辑。而这方法就是将对应的处理逻辑加入到整个处理的最后。
@Overridepublic final ChannelPipeline addLast(EventExecutorGroup executor, ChannelHandler... handlers) {if (handlers == null) {throw new NullPointerException("handlers");}for (ChannelHandler h: handlers) {if (h == null) {break;}addLast(executor, null, h);}return this;}
总结
- NioEventLoop组件
- Channel组件
- ByteBuf组件
- Pipeline组件
- ChannelHandler组件


还没有评论,来说两句吧...