Spring IOC 注解方式 依赖注入
前置技能:
Java、JDBC、Spring IOC快速入门
注解:
在快速入门里,我们已经学会了通过xml来配置依赖注入,其实在我们自己创建的类里,也可以通过注解这一更简便的方式来达到这样的效果。
Getting Started:
1、引入jar包
同上
2、创建demo需要的Service和Dao
同上
3、创建XML配置文件
<?xml version="1.0" encoding="UTF-8"?><!--标签头都是固定的--><beans xmlns="http://www.springframework.org/schema/beans" xmlns:context="http://www.springframework.org/schema/context" xmlns:xsi="http://www.w3.org/2001/XMLSchema-instance" xsi:schemaLocation="http://www.springframework.org/schema/beans https://www.springframework.org/schema/beans/spring-beans.xsd http://www.springframework.org/schema/context https://www.springframework.org/schema/context/spring-context.xsd"><!--开启注解 就这一行内容--><context:component-scan base-package="com.ariko"></context:component-scan></beans>
4、在类文件中添加注解
注解有四种,功能一样,但开发中我们一般按照语意去使用:
@Component 注解其他
@Controller 注解控制层
@Service 注解服务层
@Repository 注解dao层Dao接口
//接口中无需注解public interface UserDao {void doSomething();}
Dao实现类
import org.springframework.stereotype.Repository;//注解是加在实现类的@Repositorypublic class UserDaoImpl implements UserDao {@Overridepublic void doSomething() {System.out.println("我是Userdao的实现类!");}}
当Service中依赖注入UserDao时,会注入有@Repository注解的那个实现类。
也就是说:一个接口,只能有一个带注解的实现类。
5、阶段测试
Test
public class Test {public static void main(String[] args) {//实例化核心对象ApplicationContext ac=new ClassPathXmlApplicationContext("applicationContext.xml");//获取注入的daoUserDao dao=ac.getBean(UserDao.class);dao.doSomething();
运行结果
6、多层的依赖注入 注解
Servlet持有一个Service对象,Service的实现类对象持有一个Dao的实现类对象。
——这种多层的依赖注入,我们需要在依赖注入的属性上也做注解。
在上述代码的基础上,再加入一个Service类。
Service及其实现类
//和dao一样,接口里不用写注解public interface UserService {void doSomething();}
依赖注入的属性需要声明set方法!
import org.springframework.beans.factory.annotation.Autowired;import org.springframework.stereotype.Service;//使用了注解@Servicepublic class UserServiceImpl implements UserService {//这个属性依赖注入 使用了注解@Autowiredprivate UserDao daoImpl;@Overridepublic void doSomething() {System.out.println("我是User的servie");daoImpl.doSomething();}//依赖注入的属性需要set方法!public UserDao getDaoImpl() {return daoImpl;}public void setDaoImpl(UserDao daoImpl) {this.daoImpl = daoImpl;}}
7、完成 和 测试
Test
public class Test {public static void main(String[] args) {//实例化核心类ApplicationContext ac=new ClassPathXmlApplicationContext("applicationContext.xml");//获取注入的service对象UserService ser=ac.getBean(UserService.class);ser.doSomething();
运行结果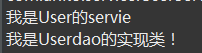
可以看到,service实现类和dao实现类的方法都运行了,如果没有使用 @Autowired 注解依赖注入的属性,这里调用dao的方法时,是会报空指针异常的。
*8、其他
@Resource 和 @Autowired
@Resource 默认按照形参名去查找bean进行注入,按照名称找不到,继续按照类型进行查找。
@Autowired 默认按照类型查找bean进行注入,若找不到,继续按照形参名进行查找。
单例 singleton和 多例 prototype
通过Scope注解选择,默认是单例
@Repository@Scope(value="prototype")public class UserDaoImpl implements UserDao {@Overridepublic void doSomething() {System.out.println("我是Userdao的实现类!");}}


还没有评论,来说两句吧...