spring-cloud-eureka 与 Ribbon负载均衡(二)
Ribbon简单介绍
1、 Ribbon主要提供客户端的软件负载均衡算法(说白了就是排队的时候哪个队伍人少就排哪)。
2、Ribbon客户端组件提供一系列完善的配置项如何连接超时、重试等。
3、负载均衡的算法可以自定义。
搭建环境
我这里搭建的是eureka的集群,可以使用单机版的配置就可以了,这里就讲一下如何搭建和配置单机版的Eureka,不会搭集群或是想要搭的铁汁儿点这里:https://blog.csdn.net/qq_41647999/article/details/93382252
Eureka的环境搭建与配置
新建一个maven的模块,如下:
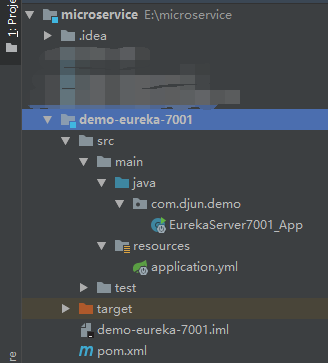
POM.xml
这里注意:引入的eureka记得加上版本,可以再项目的主POM里面加了引入一下,还有就是需要引入熔断器,可能是eureka的高版本要求的。
<?xml version="1.0" encoding="UTF-8"?><project xmlns="http://maven.apache.org/POM/4.0.0"xmlns:xsi="http://www.w3.org/2001/XMLSchema-instance"xsi:schemaLocation="http://maven.apache.org/POM/4.0.0 http://maven.apache.org/xsd/maven-4.0.0.xsd"><parent><artifactId>microservice</artifactId><groupId>com.djun.demo</groupId><version>1.0-SNAPSHOT</version></parent><modelVersion>4.0.0</modelVersion><packaging>jar</packaging><artifactId>demo-eureka-7001</artifactId><version>${project.version}</version><dependencies><!-- Eureka --><dependency><groupId>org.springframework.cloud</groupId><artifactId>spring-cloud-netflix-eureka-server</artifactId><!--<version>2.2.0.BUILD-SNAPSHOT</version>--></dependency><dependency><groupId>org.springframework.cloud</groupId><artifactId>spring-cloud-starter-netflix-hystrix</artifactId></dependency></dependencies></project>
EurekaServer7001_App.java
import org.springframework.boot.SpringApplication;import org.springframework.boot.autoconfigure.SpringBootApplication;import org.springframework.cloud.netflix.eureka.server.EnableEurekaServer;@SpringBootApplication// 标注这是EurekaServer服务启动类,接收其它微服务注册进来@EnableEurekaServerpublic class EurekaServer7001_App {public static void main(String[] args) {SpringApplication.run(EurekaServer7001_App.class,args);}}
application.yml
server:port: 7001eureka:instance:# eureka服务端的实例名称hostname: localhostclient:#false表示不向注册中心注册自己。register-with-eureka: false#false表示自己端就是注册中心,我的职责就是维护服务实例,并不需要去检索服务fetch-registry: falseservice-url:#设置与Eureka Server交互的地址查询服务和注册服务都需要依赖这个地址(单机版)。defaultZone: http://${eureka.instance.hostname}:${server.port}/eureka/
微服务提供模块的搭建
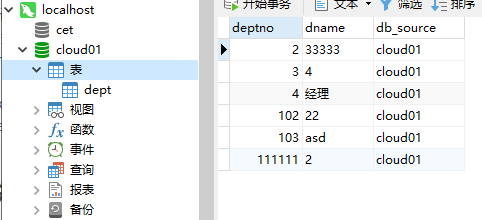
这个模块主要是用来提供api,我这里主要是在搭架子,数据库只有一张表:
接口也就是对这张表的增删改查,这里的代码不是重点就不写出来了,关键是一些配置信息问题请看下方。
值得强调的是,这个是一个微服务需要作为Eureka的客户端向Eureka服务端注册:
启动类:DemoProvider8001_App.java
import org.springframework.boot.SpringApplication;import org.springframework.boot.autoconfigure.SpringBootApplication;import org.springframework.cloud.client.discovery.EnableDiscoveryClient;import org.springframework.cloud.netflix.eureka.EnableEurekaClient;/*** created by DJun on 2019/6/20*/@SpringBootApplication// 服务启动之后自动注册进入Eureka@EnableEurekaClient// 服务发现@EnableDiscoveryClientpublic class DemoProvider8001_App {// 启动嵌入式的 Tomcat 并初始化 Spring 环境及其各 Spring 组件public static void main(String[] args) {SpringApplication.run(DemoProvider8001_App.class,args);}}
application.yml
微服务注册进入Eureka的配置如下
eureka:client:#客户端注册进eureka服务列表内service-url:# 1、单机版配置defaultZone: http://localhost:7001/eureka/# 2、集群版配置# defaultZone: http://eureka7001.com:7001/eureka/,http://eureka7002.com:7002/eureka/,http://eureka7003.com:7003/eureka/instance:# 服务名称修改instance-id: demo-provider-8001# 设置访问信息有IP 信息提示prefer-ip-address: true# info是当前微服务的信息info:app.name: microservice-democompany.name: com.djun.demobuild.artifactId: $project.artifactId$build.version: $project.version$
ribbon客户端的搭建
其实,ribbon的使用很简单,但是原理不容易学。这里再配置文件里面加上一个 @LoadBalanced 即可开启ribbon的负载均衡,ribbon也提供了很多种负载均衡的算法,在他们的GitHub上可以找到算法的源码,也可以自定义算法,下面我将举一个demo如何自定义负载均衡的算法(建议配置成集群版的eureka)。
客户端也需要注册进入Eureka,新建一个maven模块如下:
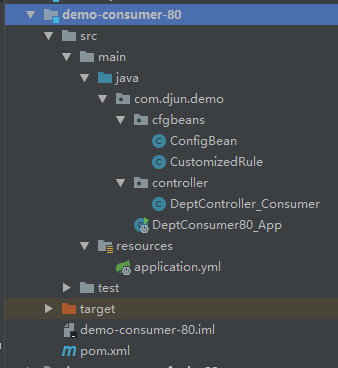
ConfigBean.java
import com.netflix.loadbalancer.*;import org.springframework.cloud.client.loadbalancer.LoadBalanced;import org.springframework.context.annotation.Bean;import org.springframework.context.annotation.Configuration;import org.springframework.web.client.RestTemplate;@Configurationpublic class ConfigBean {@Bean//开启负载均衡@LoadBalancedpublic RestTemplate restTemplate(){return new RestTemplate();}@Beanpublic IRule myRule(){// 根据平均响应的时间计算所有服务的权重,响应时间越快服务权重越大被选中的概率越高// return new WeightedResponseTimeRule();// 自定义的算法类return new CustomizedRule();}}
CustomizedRule.java
import com.netflix.client.config.IClientConfig;import com.netflix.loadbalancer.AbstractLoadBalancerRule;import com.netflix.loadbalancer.ILoadBalancer;import com.netflix.loadbalancer.Server;import java.util.List;/*** created by DJun on 2019/6/27* 每个微服务访问5次 再轮询*/public class CustomizedRule extends AbstractLoadBalancerRule {private int callTotal = 0; // 总共被调用的次数,目前要求每台被调用5次private int currentIndex = 0; // 当前提供服务的机器号public Server choose(ILoadBalancer lb, Object key) {if (lb == null) {return null;}Server server = null;while (server == null) {if (Thread.interrupted()) {return null;}// 获取正常工作的微服务List<Server> upList = lb.getReachableServers();// 获取全部的微服务List<Server> allList = lb.getAllServers();// 微服务总数int serverCount = allList.size();if (serverCount == 0) {return null;}// 当前微服务使用未满5次if (callTotal < 5) {server = upList.get(currentIndex);callTotal++;} else { // 已满5次,换下一台微服务callTotal = 0;currentIndex++;// 如果微服务的机器超过了最后一台,再轮询if (currentIndex >= upList.size()) {currentIndex = 0;}}if (server == null) {// 服务为空(比如某台服务挂掉了)则让其它的现成先进行Thread.yield();continue;}if (server.isAlive()) {return (server);}server = null;Thread.yield();}return server;}@Overridepublic Server choose(Object key) {return choose(getLoadBalancer(), key);}@Overridepublic void initWithNiwsConfig(IClientConfig clientConfig) {}}
DeptController_Consumer.java
这里用了一个 RestTemplate 将Controller的api在进一次封装隐藏,解释见注释:
import com.djun.demo.model.Dept;import org.springframework.web.bind.annotation.GetMapping;import org.springframework.web.bind.annotation.PathVariable;import org.springframework.web.bind.annotation.RequestMapping;import org.springframework.web.bind.annotation.RestController;import org.springframework.web.client.RestTemplate;import javax.annotation.Resource;import java.util.List;/*** created by DJun on 2019/6/22*/@RestControllerpublic class DeptController_Consumer {/*** 1、RestTemplate 类似于 JDBCTemplate* 2、Controller 通过RestTemplate来对Rest的调用和发出* 3、参数: (url, requestMap, ResponseBean.class)* url: REST 请求地址* requestMap:请求参数* ResponseBean.class: HTTP响应转换被转换成的对象类型**/@Resourceprivate RestTemplate restTemplate;// 访问微服务提供者的端口地址// private static final String REST_URL_PREFIX = "http://localhost:8001";// 微服务提供者的名称private static final String REST_URL_PREFIX = "http://MICROSERVICE-DEMO";@RequestMapping("/consumer/dept/add")public boolean add(Dept dept){return restTemplate.postForObject(REST_URL_PREFIX+"/dept/add",dept,Boolean.class);}@SuppressWarnings("unchecked")@RequestMapping("/consumer/dept/findById/{id}")public List<Dept> findById(@PathVariable("id") Long id){return restTemplate.getForObject(REST_URL_PREFIX+"/dept/findById/"+id,List.class);}@SuppressWarnings("unchecked")@RequestMapping("/consumer/dept/list")public List<Dept> findAll(){return restTemplate.getForObject(REST_URL_PREFIX+"/dept/list",List.class);}@GetMapping("/consumer/discovery")public Object discovery(){return restTemplate.getForObject(REST_URL_PREFIX+"/discovery",Object.class);}}
启动类
import com.djun.demo.cfgbeans.ConfigBean;import org.springframework.boot.SpringApplication;import org.springframework.boot.autoconfigure.SpringBootApplication;import org.springframework.cloud.netflix.eureka.EnableEurekaClient;import org.springframework.cloud.netflix.ribbon.RibbonClient;@SpringBootApplication@EnableEurekaClient//@EnableDiscoveryClient// 加载自定的Ribbon配置类@RibbonClient(name = "MICROSERVICE-DEMO",configuration = ConfigBean.class)public class DeptConsumer80_App {public static void main(String[] args) {SpringApplication.run(DeptConsumer80_App.class,args);}}
再次访问接口的时候就要使用消费者模块的80端口。


")


还没有评论,来说两句吧...