Spring Cloud Config 配置中心(六)
目录直通车
一、面临的问题
二、解决问题
三、配置及使用Config
1、配置Config的Server端
2、配置Eureka的Server端
3、微服务提供者
4、启动与测试
一、面临的问题
分布式系统面临的配置问题!
微服务把单体应用中的业务拆分成一个个子服务,经过之前的学习,大家都知道,每新建一个模块都伴随一个yml的配置文件,倘若100个模块岂不是会存在100个yml?
于是需要一套集中式的、动态配置管理设施是必不可少的。ConfigServer就出现了。
二、解决问题
在Spring Cloud中,有分布式配置中心组件spring cloud config ,它支持配置服务放在配置服务的内存中(即本地),也支持放在远程Git仓库中。在spring cloud config 组件中,分两个角色,一是config server,二是config client。

1、集中管理配置文件
2、不同环境不同配置,动态更新配置,分环境部署dev/test/prod/beta/release
3、运行期间动态调整配置,服务会向配置中心统一拉取自己的配置信息
4、更改配置后,服务不用重启即可更新配置
5、将配置信息以Restful api的形式暴露
三、配置及使用Config
先说一下最终实现的效果吧~
(1)将所有的配置文件放到Github中,实现Config的集中式管理。
(2)将微服务提供者注册成Eureka的客户端与Config的客户端并注册进Eureka的服务端。
(3)最终展现出上面图片中的流程。
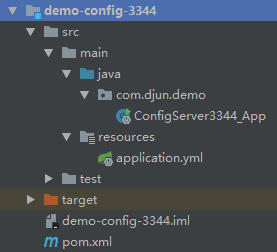
1、配置Config的Server端
新建如下maven模块,结构如下:
POM
<dependencies><dependency><groupId>org.springframework.cloud</groupId><artifactId>spring-cloud-config-server</artifactId><version>2.0.0.M9</version></dependency></dependencies>
启动类
@SpringBootApplication@EnableConfigServerpublic class ConfigServer3344_App {public static void main(String[] args) {SpringApplication.run(ConfigServer3344_App.class,args);}}
application.yml
server:port: 3344spring:application:name: microservice-configcloud:config:server:git:uri: https://github.com/DJun5/microservice-demo-config
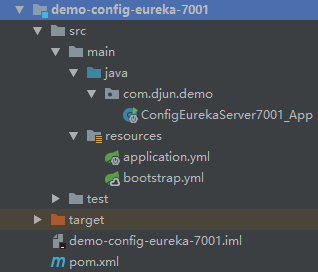
2、配置Eureka的Server端
新建如下模块:
POM
<dependencies><!-- Config Client --><dependency><groupId>org.springframework.cloud</groupId><artifactId>spring-cloud-starter-config</artifactId></dependency><dependency><groupId>org.springframework.boot</groupId><artifactId>spring-boot-starter-jetty</artifactId></dependency><!-- web --><dependency><groupId>org.springframework.boot</groupId><artifactId>spring-boot-starter-web</artifactId></dependency><!-- Actuator,感应服务端变化--><dependency><groupId>org.springframework.boot</groupId><artifactId>spring-boot-starter-actuator</artifactId></dependency><!-- Eureka Server--><dependency><groupId>org.springframework.cloud</groupId><artifactId>spring-cloud-netflix-eureka-server</artifactId></dependency><dependency><groupId>org.springframework.cloud</groupId><artifactId>spring-cloud-starter-netflix-hystrix</artifactId></dependency><!-- 修改后立即生效,热部署 --><dependency><groupId>org.springframework</groupId><artifactId>springloaded</artifactId><version>${springloaded.version}</version></dependency><dependency><groupId>org.springframework.boot</groupId><artifactId>spring-boot-devtools</artifactId></dependency></dependencies>
启动类
@SpringBootApplication@EnableEurekaServerpublic class ConfigEurekaServer7001_App {public static void main(String[] args) {SpringApplication.run(ConfigEurekaServer7001_App.class,args);}}
eureka-7001.yml
此文件内容放在上面配置的Github仓库中,三根减号“—-”表示区域分隔线。
spring:profiles:active:- dev---server:port: 7001spring:profiles: devapplication:name: demo-config-eurekaeureka:instance:hostname: eureka7001.comclient:# 自己不注册进服务列表register-with-eureka: false# 不通过eureka获取注册信息fetch-registry: falseservice-url:# defaultZone: http://eureka7001.com:7001/eureka/,http://eureka7002.com:7002/eureka/,http://eureka7003.com:7003/eureka/defaultZone: http://eureka7001.com:7001/eureka/---server:port: 7001spring:profiles: testapplication:name: demo-config-eurekaeureka:instance:hostname: eureka7001.comclient:# 自己不注册进服务列表register-with-eureka: false# 不通过eureka获取注册信息fetch-registry: falseservice-url:# defaultZone: http://eureka7001.com:7001/eureka/,http://eureka7002.com:7002/eureka/,http://eureka7003.com:7003/eureka/defaultZone: http://eureka7001.com:7001/eureka/
bootstrap.yml
(1)bootstrap(系统级)的优先级高于application(用户级)。
(2)下面的配置作用为:访问此路径 http://localhost:3344/eureka-7001-dev.yml 使得 Config Server 端去 Github 找 eureka-7001.yml 的 dev 部分。
spring:cloud:config:name: eureka-7001profile: devlabel: masteruri: http://localhost:3344
application.yml
这个文件可以不配置了,只是习惯的问题,写了以下内容
spring:application:name: eureka-7001
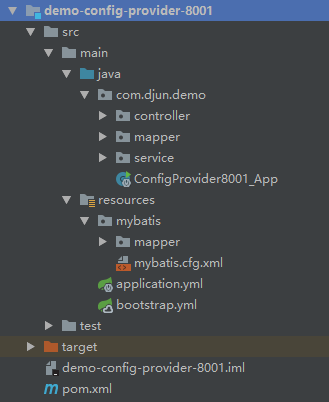
3、微服务提供者
这个模块需要注册为Config的Client和Eureka的Client,新建如下目录:
Controller
@RestController@RequestMapping("/dept")public class DeptController {@Resourceprivate DeptService service;@PostMapping("/add")public JSONResult add( @RequestBody Dept model){return JSONResult.ok(service.add(model));}@GetMapping("/findById/{id}")// 切面的方式@HystrixCommand(fallbackMethod = "processHystrix_Get")public JSONResult get(@PathVariable("id") Long id){List<Dept> dept ;dept = service.get(id);if (dept.size() == 0){// throw new RuntimeException("该ID:"+id+",没有对应的信息");return JSONResult.errorMsg("该ID:"+id+",没有对应的信息");}return JSONResult.ok(service.get(id));}@GetMapping("/list")public JSONResult getAll(){return JSONResult.ok(service.list());}@PostMapping("/delete/{id}")public JSONResult delete(@PathVariable("id") Long id){return JSONResult.ok(service.delete(id));}/*** 响应注解 @HystrixCommand*/public JSONResult processHystrix_Get(Long id){return JSONResult.errorMsg("该ID:"+id+",没有对应的信息--->@HystrixCommand");}}
Mapper
@Mapperpublic interface DeptMapper {boolean addDept(Dept modelName);List<Dept> findById(Long id);List<Dept> findAll();boolean delete(Long id);}
Service
public interface DeptService {boolean add(Dept modelName);List<Dept> get(Long id);List<Dept> list();boolean delete(Long id);}
ServiceImpl
@Servicepublic class DeptServiceImpl implements DeptService {@Resourceprivate DeptMapper mapper;@Overridepublic boolean add(Dept modelName) {return mapper.addDept(modelName);}@Overridepublic List<Dept> get(Long id) {return mapper.findById(id);}@Overridepublic List<Dept> list() {return mapper.findAll();}@Overridepublic boolean delete(Long id) {return mapper.delete(id);}}
启动类
@SpringBootApplication// 服务启动之后自动注册进入Eureka@EnableEurekaClient// 服务发现@EnableDiscoveryClient// Hystrix断路器@EnableCircuitBreakerpublic class ConfigProvider8001_App {public static void main(String[] args) {SpringApplication.run(ConfigProvider8001_App.class,args);}// 解决SpringBoot2.0版本对hystrix监控流失效的问题@Beanpublic ServletRegistrationBean getServlet() {HystrixMetricsStreamServlet streamServlet = new HystrixMetricsStreamServlet();ServletRegistrationBean registrationBean = new ServletRegistrationBean(streamServlet);registrationBean.setLoadOnStartup(1);registrationBean.addUrlMappings("/hystrix.stream");registrationBean.setName("HystrixMetricsStreamServlet");return registrationBean;}}
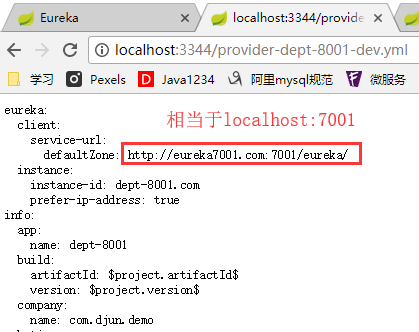
provider-dept-8001.yml 放Github仓库
spring:profiles:active:- dev---server:port: 8001spring:profiles: devapplication:name: dept-hystrix-provider-8001datasource:driver-class-name: com.mysql.jdbc.Driver # mysql驱动包url: jdbc:mysql://localhost:3306/cloud01 # 数据库名称username: rootpassword: roottype: com.alibaba.druid.pool.DruidDataSource # 当前数据源操作类型dbcp2:min-idle: 5 # 数据库连接池的最小维持连接数initial-size: 5 # 初始化连接数max-total: 5 # 最大连接数max-wait-millis: 200 # 等待连接获取的最大超时时间tomcat:max-wait: 30000 # 配置间隔多久才进行一次检测需要关闭的空闲连接,单位是毫秒mybatis:config-location: classpath:mybatis/mybatis.cfg.xml # mybatis配置文件所在路径type-aliases-package: com.djun.demo.model # 所有Entity别名类所在包mapper-locations: classpath:mybatis/mapper/**/*.xml # mapper映射文件eureka:client:service-url:defaultZone: http://eureka7001.com:7001/eureka/instance:instance-id: dept-8001.comprefer-ip-address: true# info是当前微服务的信息info:app.name: dept-8001company.name: com.djun.demobuild.artifactId: $project.artifactId$build.version: $project.version$---server:port: 8001spring:profiles: testapplication:name: dept-hystrix-provider-8001datasource:driver-class-name: com.mysql.jdbc.Driver # mysql驱动包url: jdbc:mysql://localhost:3306/cloud01 # 数据库名称username: rootpassword: roottype: com.alibaba.druid.pool.DruidDataSource # 当前数据源操作类型dbcp2:min-idle: 5 # 数据库连接池的最小维持连接数initial-size: 5 # 初始化连接数max-total: 5 # 最大连接数max-wait-millis: 200 # 等待连接获取的最大超时时间tomcat:max-wait: 30000 # 配置间隔多久才进行一次检测需要关闭的空闲连接,单位是毫秒mybatis:config-location: classpath:mybatis/mybatis.cfg.xml # mybatis配置文件所在路径type-aliases-package: com.djun.demo.model # 所有Entity别名类所在包mapper-locations: classpath:mybatis/mapper/**/*.xml # mapper映射文件eureka:client:service-url:defaultZone: http://eureka7001.com:7001/eureka/instance:instance-id: dept-8001.comprefer-ip-address: true# info是当前微服务的信息info:app.name: dept-8001company.name: com.djun.demobuild.artifactId: $project.artifactId$build.version: $project.version$
bootstrap.yml
spring:cloud:config:name: provider-dept-8001profile: devlabel: masteruri: http://localhost:3344
application.yml
spring:application:name: provider-8001
4、启动与测试
启动顺序:Config Server(3344)-> Eureka Server(7001) -> Provider(8001)
查看Config:
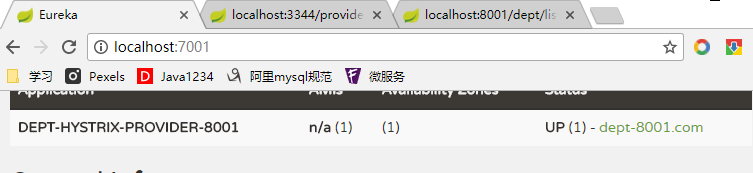
查看Eureka:
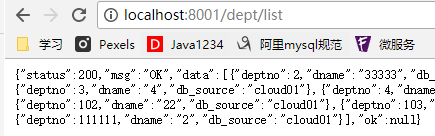
一切正常后访问provider的接口:
全部免费源码传送,下载里面的压缩包:https://github.com/DJun5/microservice-demo


—— 图和会话")
—— 保存和恢复")
—— 开始Python之旅")
—— 变量和数据类型")


还没有评论,来说两句吧...