自定义控件
目录
- 引入布局
- 创建自定义控件
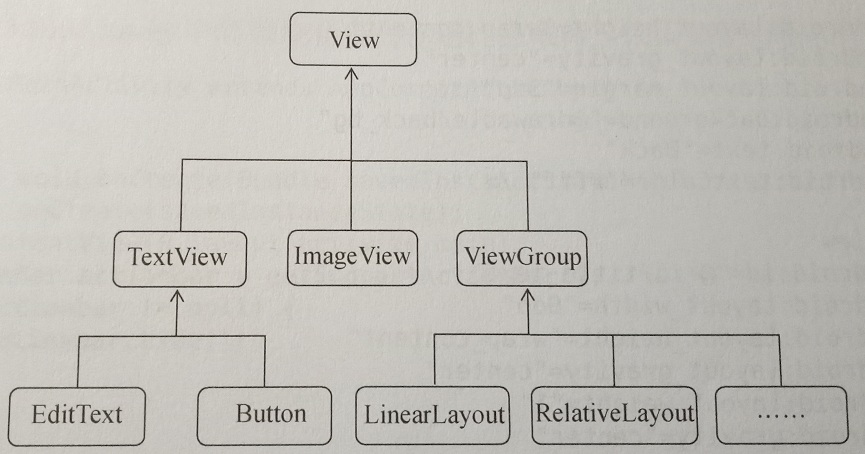
所有的控件都是直接或间接继承自View,所用的所有的布局都是直接或间接继承自ViewGroup的。
一:引入布局
一般我们的程序可能有很多活动都需要这样的标题栏,但每个布局都编写一遍同样的标题栏代码,就会导致代码大量重复,可以使用引用布局解决这问题。
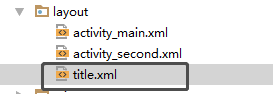
创建一个布局,名字自己取
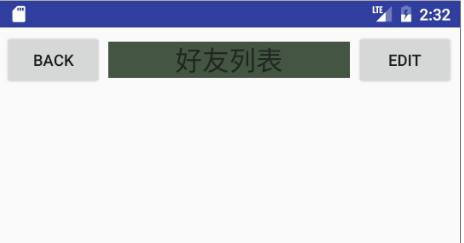
<?xml version="1.0" encoding="utf-8"?><LinearLayout xmlns:android="http://schemas.android.com/apk/res/android"android:layout_width="match_parent"android:layout_height="wrap_content"><Buttonandroid:layout_width="wrap_content"android:layout_height="wrap_content"android:layout_gravity="center"android:layout_margin="5dp"android:text="back" /><!--layout_gravity控件的对齐方式--><!--layout_margin可以指定控件在上下左右方向上偏移的距离--><TextViewandroid:layout_width="0dp"android:layout_height="wrap_content"android:layout_gravity="center"android:layout_weight="1"android:gravity="center"android:text="好友列表"android:textSize="24sp"android:background="#454"/><!--gravity文字对齐方式--><Buttonandroid:layout_width="wrap_content"android:layout_height="wrap_content"android:layout_gravity="center"android:layout_margin="5dp"android:text="Edit" /><!--layout_gravity控件的对齐方式--></LinearLayout>
在这里添加一句代码
<?xml version="1.0" encoding="utf-8"?><LinearLayout xmlns:android="http://schemas.android.com/apk/res/android"android:layout_width="match_parent"android:layout_height="match_parent"><include layout="@layout/title"/></LinearLayout>

最后在MainActivity加上代码将系统自带的标题栏隐藏掉
//调用getSupportActionBar方法获得ActionBar的实例ActionBar actionBar = getSupportActionBar();if (actionBar != null){actionBar.hide(); //将标题栏隐藏}
二:创建自定义控件
还是同理引用布局,要每个控件都编写一次事件会麻烦,可以使用自定义控件的方式来解决。
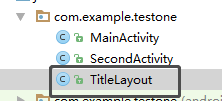
package com.example.testone;import android.app.Activity;import android.content.Context;import android.util.AttributeSet;import android.util.Log;import android.view.LayoutInflater;import android.view.View;import android.widget.Button;import android.widget.LinearLayout;public class TitleLayout extends LinearLayout{//重写TitleLayout构造函数public TitleLayout(Context context, AttributeSet attrs){super(context,attrs);//对布局进行动态加载//通过LayoutInflater的from方法构建一个LayoutInflater对象,然后调用inflate方法动态加载一个布局文件//第一个参数是要加载的布局文件的id,第二个是给加载好的布局再添加一个父布局,这里我们指定为TitleLayout,于是直接传入thisLayoutInflater.from(context).inflate(R.layout.title,this);}}
自定义控件创建好了,还要在布局文件中添加这个自定义控件,修改这里的代码
<?xml version="1.0" encoding="utf-8"?><LinearLayout xmlns:android="http://schemas.android.com/apk/res/android"android:layout_width="match_parent"android:layout_height="match_parent"><!--要指明控件的完整类名,包名在这里是不可以省略的--><com.example.testone.TitleLayoutandroid:layout_width="match_parent"android:layout_height="wrap_content"/></LinearLayout>
为标题栏添加点击事件
package com.example.testone;import android.app.Activity;import android.content.Context;import android.util.AttributeSet;import android.util.Log;import android.view.LayoutInflater;import android.view.View;import android.widget.Button;import android.widget.LinearLayout;/*** Created by AUSU on 2019/3/10.*/public class TitleLayout extends LinearLayout{//重写TitleLayout构造函数public TitleLayout(Context context, AttributeSet attrs){super(context,attrs);//对布局进行动态加载//通过LayoutInflater的from方法构建一个LayoutInflater对象,然后调用inflate方法动态加载一个布局文件//第一个参数是要加载的布局文件的id,第二个是给加载好的布局再添加一个父布局,这里我们指定为TitleLayout,于是直接传入thisLayoutInflater.from(context).inflate(R.layout.title,this);Button titleBack = (Button) findViewById(R.id.back);Button titleEdit = (Button) findViewById(R.id.edit);titleBack.setOnClickListener(new OnClickListener() {@Overridepublic void onClick(View v) {((Activity)getContext()).finish();}});titleEdit.setOnClickListener(new OnClickListener() {@Overridepublic void onClick(View v) {Log.d("MainActivity","这里执行成功");}});}}
点击back是退出,点击edit 在控制台显示这个消息


还没有评论,来说两句吧...