uniapp 仿照小米有品 轮播图组件(堆叠轮播组件)
仿小米有品 轮播图组件
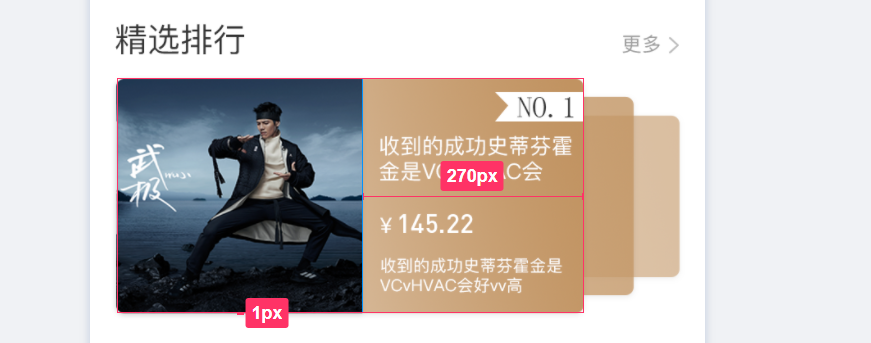
公司UI提供的精钢区的轮播图样式如上图所示:
本着简单高效的编程习惯,我打开了百度……
由于公司现在使用的是 uniapp,所以先从DCLOUD 插件市场查找。
找到一个堆叠轮播组件:

dcloud堆叠轮播组件:https://ext.dcloud.net.cn/plugin?id=1250
最终样式调整之后展示的效果如下图所示: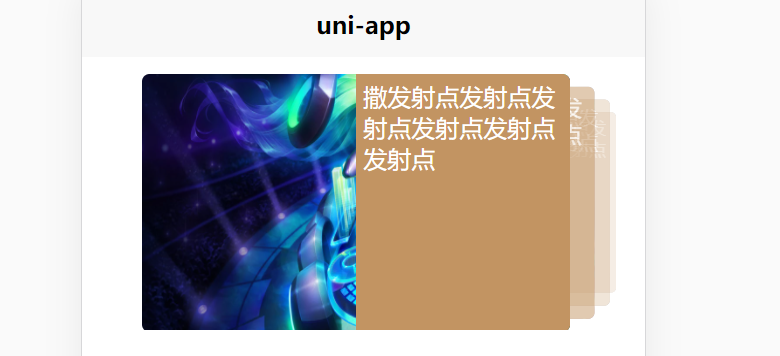
代码如下:
//组件导入:import blackmonthSwiper from "@/components/blackmonth-swiper/index.vue"//组件注册:components:{blackmonthSwiper},//组件数据处理:swiperList: [{type: 'image',url: 'https://ossweb-img.qq.com/images/lol/web201310/skin/big84000.jpg'}, {type: 'image',url: 'https://ossweb-img.qq.com/images/lol/web201310/skin/big37006.jpg',}, {type: 'image',url: 'https://ossweb-img.qq.com/images/lol/web201310/skin/big39000.jpg'}, {type: 'image',url: 'https://ossweb-img.qq.com/images/lol/web201310/skin/big10001.jpg'}, {type: 'image',url: 'https://ossweb-img.qq.com/images/lol/web201310/skin/big25011.jpg'}, {type: 'image',url: 'https://ossweb-img.qq.com/images/lol/web201310/skin/big21016.jpg'}, {type: 'image',url: 'https://ossweb-img.qq.com/images/lol/web201310/skin/big99008.jpg'}]
轮播组件包含手动切换与自动轮播两种形式
<template><view><view class="swiperPanel" ref="swiperPanel" @touchstart="startMove" @touchend="endMove"><view class="swiperItem" v-for="(item, index) in swiperList" :key="index" :style="{transform: itemStyle[index].transform, zIndex: itemStyle[index].zIndex, opacity: itemStyle[index].opacity}"><view class="children"><image class="pic" :src="item.url"></image><view class="right">撒发射点发射点发射点发射点发射点发射点</view></view></view></view></view></template><script>var timer;export default {props: {swiperList: {type: Array,default: []}},data() {return {slideNote: {x: 0,y: 0},screenWidth: 0,itemStyle: []};},created() {var macInfo = uni.getSystemInfoSync();this.screenWidth = macInfo.screenWidth;// 计算swiper样式this.swiperList.forEach((item, index) => {this.itemStyle.push(this.getStyle(index))})timer = setInterval(()=>{this.rightSlider();},3000)},methods: {rightSlider(){var newList = JSON.parse(JSON.stringify(this.itemStyle));var last = [newList.pop()]newList = last.concat(newList)this.itemStyle = newList;},getStyle(e) {if (e > this.swiperList.length / 2) {var right = this.swiperList.length - ereturn {transform: 'scale(' + (1 - right / 10) + ') translate(-' + (right * 9) + '%,0px)',zIndex: 9999 - right,opacity: 0.5 / right}} else {return {transform: 'scale(' + (1 - e / 10) + ') translate(' + (e * 9) + '%,0px)',zIndex: 9999 - e,opacity: 0.5 / e}}},startMove(e) {clearInterval(timer);this.slideNote.x = e.changedTouches[0] ? e.changedTouches[0].pageX : 0;this.slideNote.y = e.changedTouches[0] ? e.changedTouches[0].pageY : 0;},endMove(e) {timer = setInterval(()=>{this.rightSlider();},3000)var newList = JSON.parse(JSON.stringify(this.itemStyle));if ((e.changedTouches[0].pageX - this.slideNote.x) < 0) {// 向左滑动var last = [newList.pop()]newList = last.concat(newList)} else {// 向右滑动newList.push(newList[0])newList.splice(0, 1)}this.itemStyle = newList}}}</script><style lang="scss">.swiperPanel {margin: 20rpx 0;height: 344rpx;width: 686upx;overflow: hidden;position: relative;margin-left:80upx;.swiperItem {height: 100%;width: 100%;position: absolute;top: 0;left: 0upx;transition: all .5s;.children {height: 100%;width: 570upx;margin: 2upx 160upx 2upx 0;position: relative;.right{position: absolute;right:0;top:0;width:50%;height:100%;background:#C29462;color:#fff;font-size:32upx;padding:10upx;box-sizing: border-box;border-radius: 0 10upx 10upx 0;}.pic {height: 100%;width: 100%;border-radius: 10upx;}}}}</style>


还没有评论,来说两句吧...